Data Security – Erasing it
You want to erase a part of your data, or all of it. Maybe you are replacing a small hard drive with a bigger one, maybe you are selling your Mac, doesn’t matter why, your information needs to be securely erased. Your Mac makes it very easy to get this done in a way it will never be recoverable by anyone.
Why emptying the trash is not good enough.
When you delete a file and empty the trash the file is actually still on your hard drive, it’s just the reference to that file being deleted from the filesystem. Basically making your system ‘forget’ there is a file stored in that location so whenever space is needed it will just overwrite the old file with a new one. And even then, the old file is only being overwritten once. For a file to be overwritten a few times (needed to make it unrecoverable) days, weeks or months may pass. If your system or hard drive would fall into the hands of someone else they can recover any data that has not been securely overwritten.
Erasing files.
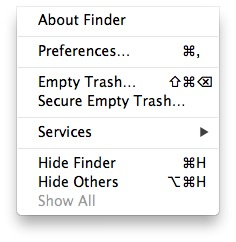
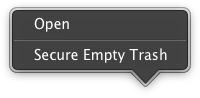
After you throw one or more files in the trash, make sure you empty it with the Secure Empty Trash option. To get this option click on the File menu in the Finder and select “Secure Empty Trash” or while holding down the Command key, right-click on the trash can and select “Secure Empty Trash”. This will delete and overwrite the file several times making it unrecoverable.
Making sure files you’ve erased in the past are gone.
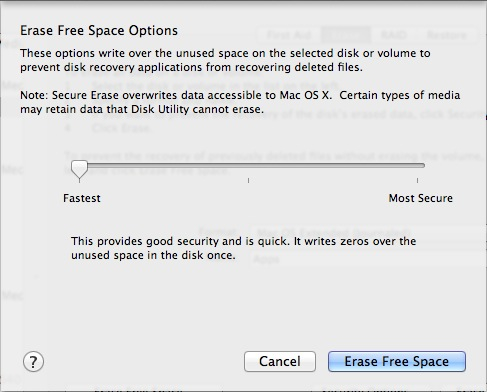
Great, now you know how to securely erase files but what about all the files you’ve erased by simply clicking “Empty Trash”? Worry not, you can still permanently overwrite those files too. Restart your Mac and directly after the startup chime hold down the Option (or Alt) key. If you run OS X Lion or Mountain Lion you’ll now be presented with a menu. Select Disk Utility. Once in Disk Utility, select your main hard drive (typically called Macintosh HD) and click the “Erase” tab. You’ll find a button down the bottom that says “Erase Free Space…”, this will overwrite any unused space on your hard drive, your erased files are part of that unused space. Use the slider to select which type of erase you’d like to use Fastest, More Secure or in the middle. Keep in mind that even the ‘Fastest’ method will make the data almost unrecoverable by normal users. If you have sensitive information to protect (blueprints for a nuclear power plant or the secret to eternal youth), set the slider in the middle. As the window will tell you, a 3-pass wipe is good enough for the DOE (Department of Energy) and short of select government agencies with véry expensive equipment and a lót of time no one will be able to recover your data, ever. If you have secrets that makes any agency willing to go that far to recover them… wait, you don’t, so use it if you want to be absolutely sure no common-man can access your data. Then there is the ‘Most Secure’ option which is a 7-pass wipe, a DOD (Dept of Defense) worthy way to get rid of all data forever. Believe it or not there are people out there that swear by a 35-pass wipe (thank you Peter Gutmann) but believe me, a single pass is great, a 3-pass is perfect, anything after that is overkill.
I prefer to run the Erase Free Space on all of my drives once in a while. Why? Some applications that save files or save changes to an old file will (non-securely) delete the old file and save a brand new one. OS X defragmentation is nice but can leave old fragmented data scatter over the drive when it consolidates files. Then there are new features like Versions, Time Machine Local Snapshots, Autosave, File caches, Swap etc. which also leave private data all over the drive which is in most cases not properly secured/deleted/cleaned up. Erase Free Space will take care of all that.
Erasing entire hard drives.
If you have multiple hard drives in your Mac or want to erase external hard drives simply open Disk Utility (located in the Applications > Utilities folder), select the drive you want to erase and click the ‘Erase’ tab. Pick a name for the drive or leave it set to what it already has and click the “Security Options…” button at the bottom of the window. With the slider that pops up select the level of the erase you want. Keep in mind this slider is different from the one described above as it has one extra setting, the first one ‘Fastest’ does not securely erase your data. So set the slider to next available setting and select a single pass wipe. Do a 3-pass wipe if you want and have the time.
If your Mac only has one hard drive this is also your startup drive holding the Operating System. In this case the erase is slightly different. You won’t be able to use Disk Utility for an erase as it simply can not erase a system while it is in use. For Mac users of OS 10.6 or older, insert the installation CD and start up from it by holding down the ‘C’ key after you hear the startup chime. Once started you can select Disk Utility from the Utilities menu and follow the steps as described above. If you use OS 10.7 or newer you won’t have an installation CD (and the ones you have won’t work anymore) so start up from an external clone drive or, if your system supports it, by holding down Command+R immediately after the startup chime to invoke OS X Internet recovery. Once booted from any other drive other than your internet startup drive, use Disk Utility and the steps as described above to securely erase the drive.
That’s it, all your data has safely been deleted. If that’s all you wanted to know then carry on to another article on this website but if you are curious and want to know more, keep reading. Some people have asked me questions about securely erasing data in specific scenarios, i’ll try to answer most of them.
How secure is a secure erase on a journaled filesystem?
Great question and the answer is, just as secure as a non-journaled file system. The HFS+ (Mac OS Extended Journaled) filesystem journal is only used for volume structures and metadata. No actual file data is included in the journal so no files can be reconstructed or recovered with the help of a journal. Though i must say i have not found any recent documentation that confirms this, i was able to find older documentation from Apple that confirms this at least for older systems/OS’s. As there have been no changes in the HFS+ or Journaling systems from what i can tell i am pretty confident the way the journaling functions has remained unchanged as well.
How secure is a secure erase on a Solid State Drive (SSD)?
A lot of different research has been done on this, most of it is not in favor stating that most data can be recovered from an SSD. Once i have found enough information that is recent and relevant i will update this answer to let you know.
1 thought on “Data Security – Erasing it”