OS X Built-in Security (2) – Users & Groups

This is a follow-up on “OS X Security & Privacy – Step by Step” (later renamed to “OS X Built-in Security – Security & privacy” same URL though). With the basic security and privacy settings out of the way you can start fine tuning. In this post i’ll explain all options and available settings in the Users & Groups system preferences.
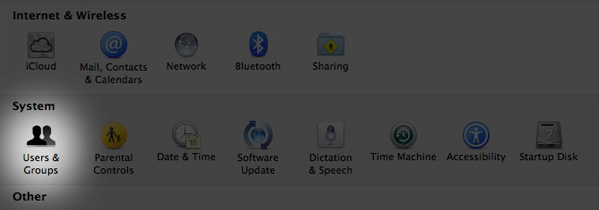
First, open up your System Preferences through the Apple menu or the icon in your Dock and select Users & Groups.

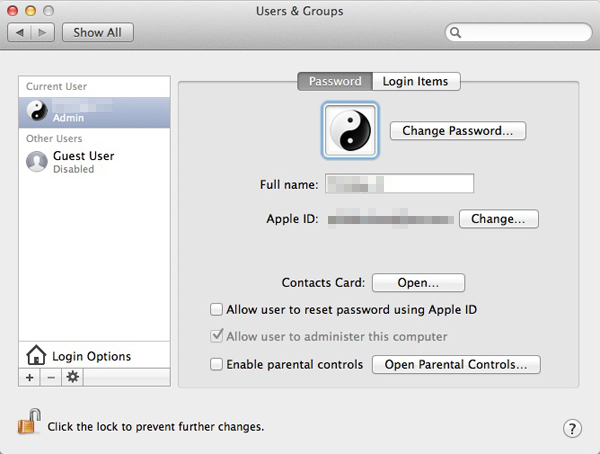
You’ll see the main window. Select your own account in the left column to see all available options for your account.

First, the option to change your profile picture or your password. Then, your full name and Apple ID (if you have one set). The Contacts Card is just a button that links directly to your information in the Contacts app. So far nothing exciting.
Allow user to reset password using Apple ID – This is an option only available if your Apple ID has been set and gives you a means of getting into your Mac if you lose your password. I only recommend using this option if you have two factor authentication enabled on your Apple ID and hide message previews on your phone. The Apple ID password reset option is not available if you have FileVault 2 enabled. I highly doubt you want to set parental controls for yourself so feel free to ignore this option.
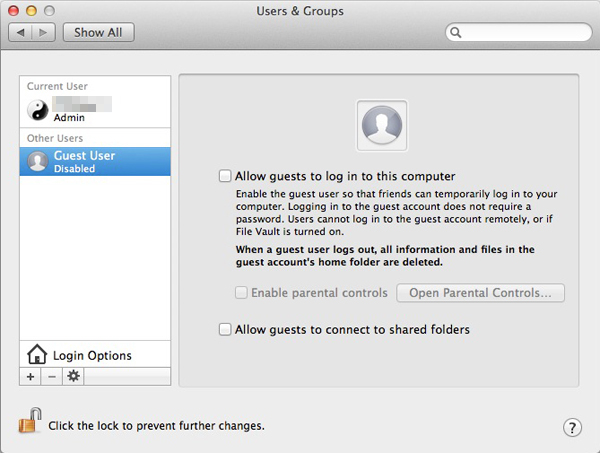
Now, click the Guest User in the left column.

Unless you absolutely have to, keep the Guest User account disabled. A skilled hacker can probably find ways to gain access to the rest of your hard drive even from a Guest User account so it’s best to limit access as much as possible. Tracking applications like Orbicule’s Undercover recommend leaving the guest account enabled so your Mac can be tracked if it’s ever stolen and the same probably goes for Find My Mac as well. Enabling a thief to at least use the Guest User account to connect to a Wi-Fi network will allow these services to track your Mac. Weigh the pros and cons and see if you want to keep the account enabled or not. If you do decide to keep it enabled at least lock it down tight with parental controls.
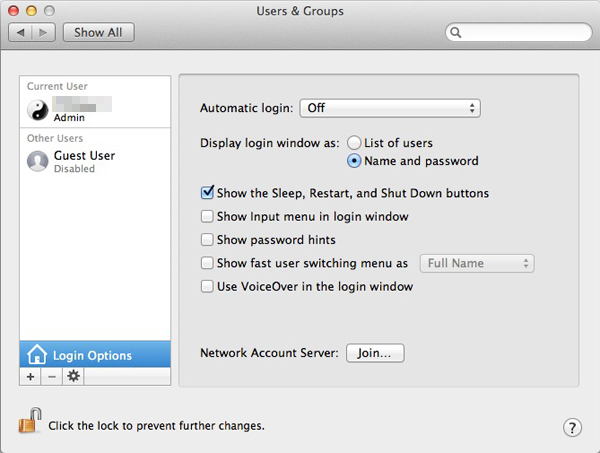
Next, click Login Options in the left column down the bottom.

First, you want to keep Automatic Login set to Off. This will always require you to login when you start your Mac.
Your login credentials are made up of two pieces, your name and your password. By default the ‘Display login window as’ is set to ‘List of users’. This will show you your login name when you start your Mac and all you have to do is enter the password. A more secure way is to set this to ‘Name and password’, this will require you to type both the name and password so it will take a few seconds longer to login. However this will take one important piece of the login puzzle away from thieves and other unauthorized users that are trying to gain access. Having the Sleep, Restart and Shut Down buttons enabled has no impact on security so it’s best to leave this checked. The same goes for showing the Input menu in the login window which will allow you to chose a different character set to type your name and password with.
Password hints can be useful for you but also give an unauthorized user a small piece of the login puzzle so unless you have a history of forgetting your passwords, it’s best to keep this disabled. Fast user switching and VoiceOver have no impact on security so set those as you please and pay no attention to the Network Account Server unless your Mac is part of a larger network and accounts are handled by a server instead of the individual machines.
With the Security, Privacy and Account settings properly configured using just the built-in options provided by OS X your Mac is now 200% safer already than it was after a default installation. More built-in security tools and features in the next post.
That’s a lot of great information Thanks!
Clear and easy to follow. Big thanks for sharing this guide Jay!