Enable two step verification for Apple ID
Go to appleid.apple.com and click “Manage your Apple ID”.

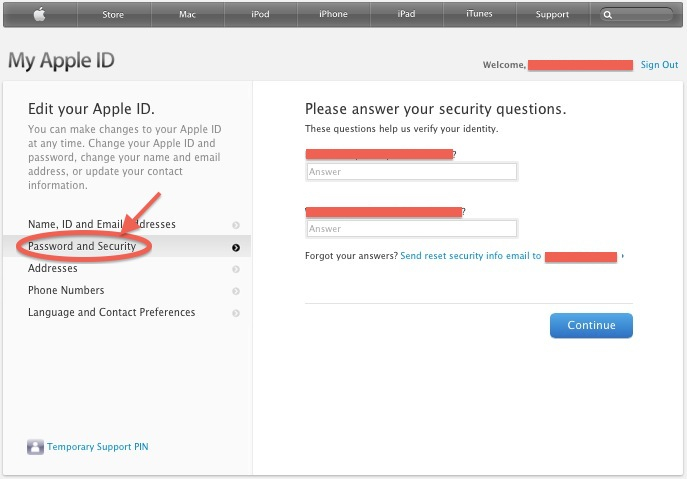
Once logged in click on “Password and Security” and answer your security questions.
Now click the “Get started” link.
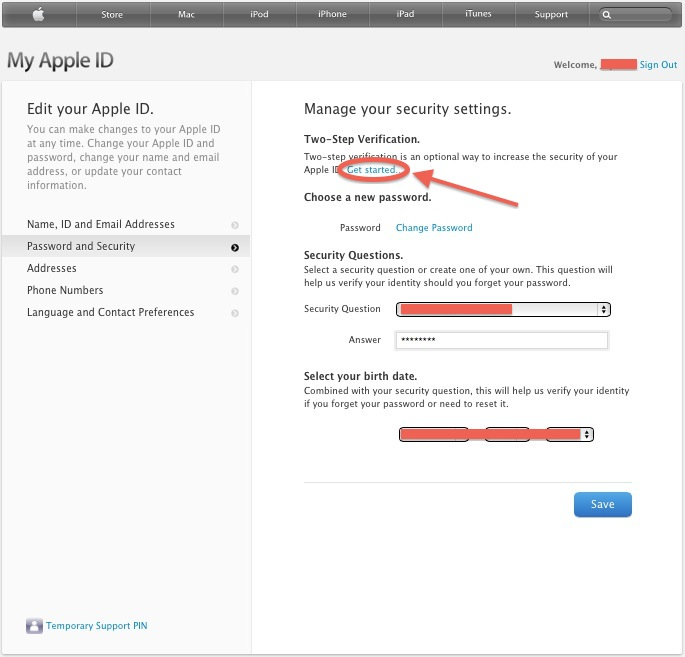
You may be asked to change your password to a more secure one during this process.
When selecting a new password, if needed, keep these tips in mind.
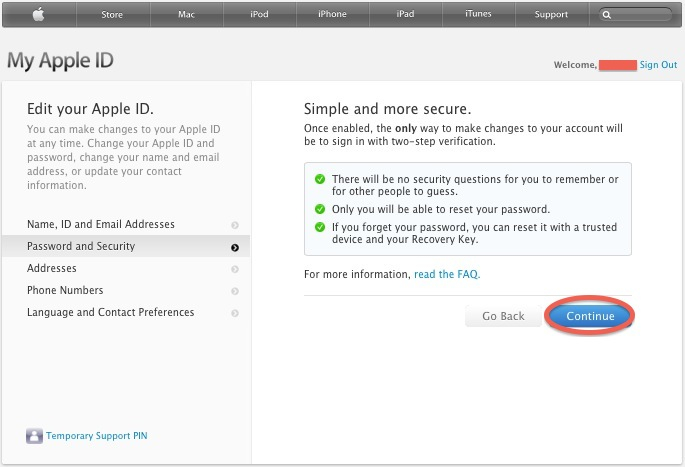
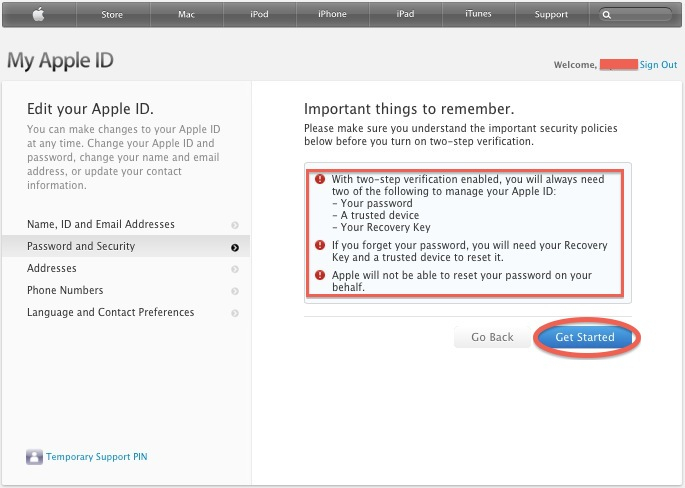
Read the information in the following screens carefully and keep clicking “Continue”
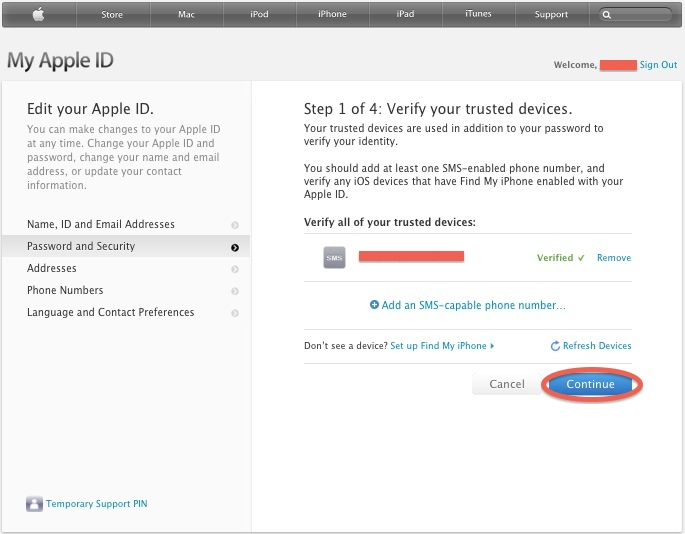
On this page select one or more trusted devices. If no devices are in the list, add one or more by setting up the Find My iPhone feature, then refresh the Devices list.
Once a device is selected a confirmation code will be sent to it, follow instructions.
When done, hit continue.
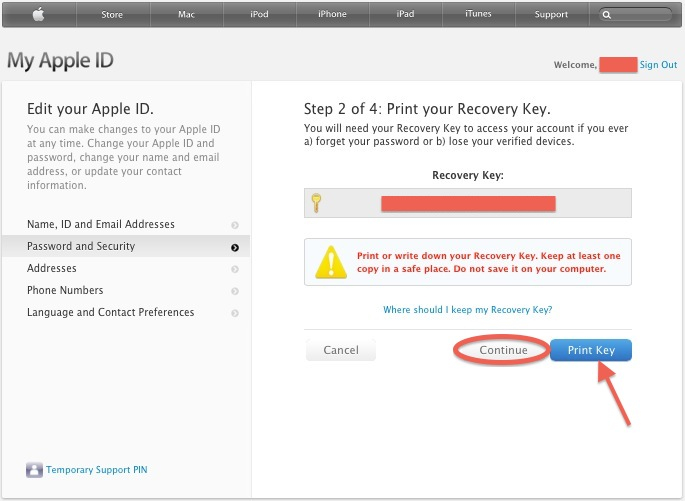
Now a Recovery Key will be provided, do NOT lose this key! Print it, write it down, do whatever you want to do to keep this Recovery Key safe. Click continue.
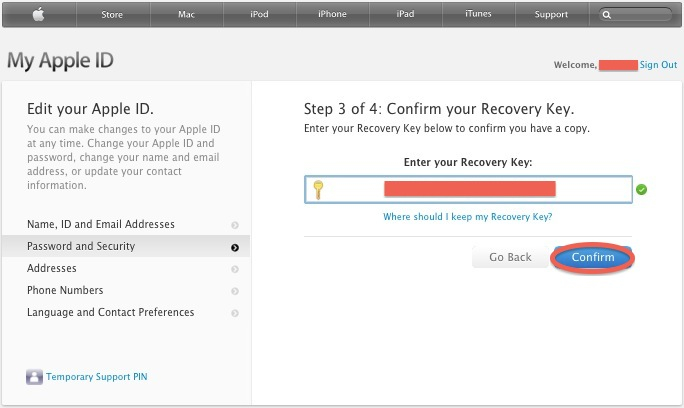
To make sure you saved it and didn’t just click Continue without paying attention you are asked to type the Recovery Key.
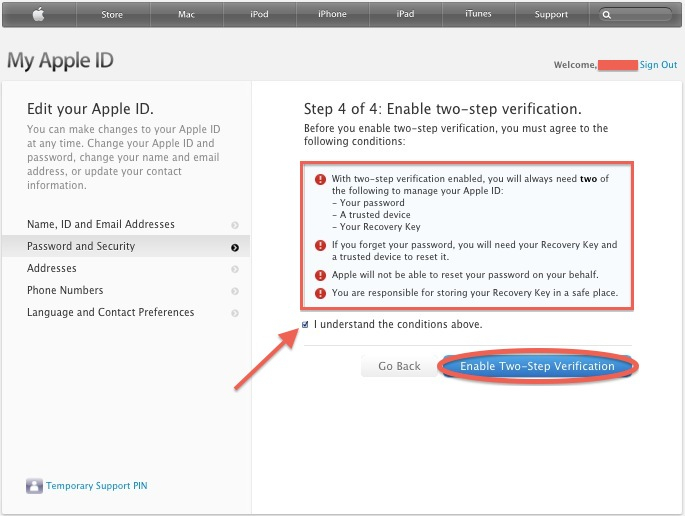
Read the conditions, click the checkbox if you agree and Enable Two-Step Verification.
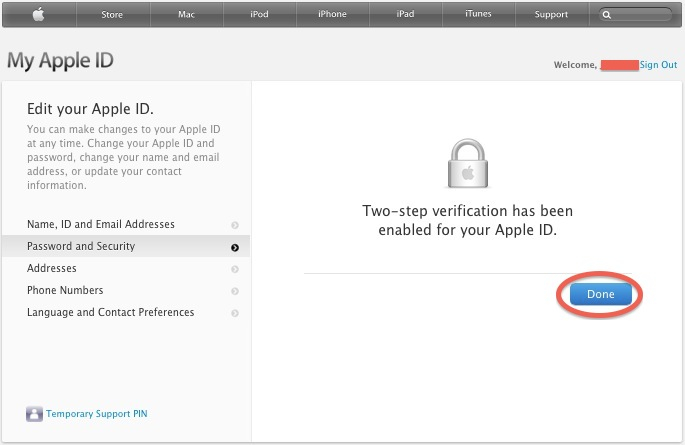
All Done.
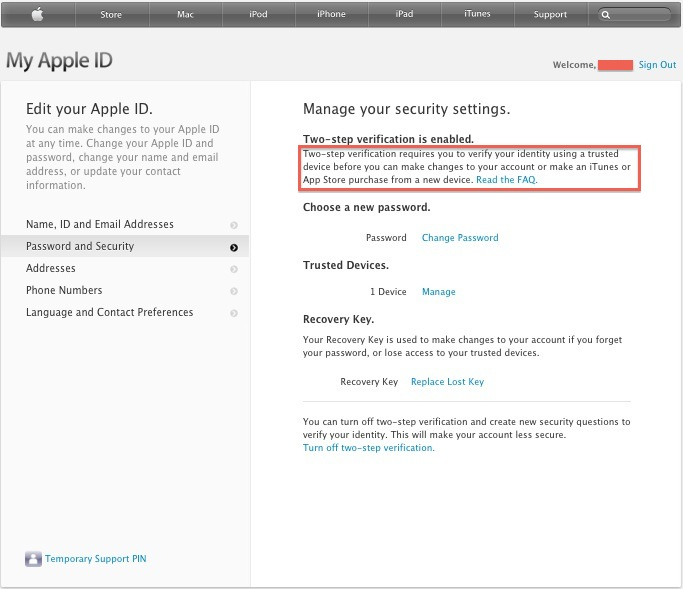
Read when you’ll be needing one of your trusted devices and proceed to the FAQ if you want more details.
All set, do this with all of your Apple ID’s if you have more than one. You may have different Apple ID’s for iCloud, iTunes Store, Home Sharing, App Store, etc.
1 thought on “Enable two step verification for Apple ID”
Comments are closed.