Caching
Caching can be really useful in environments where you use multiple Macs and/or iOS devices. All it takes is enabling the service and the server will take care of the rest. By being on the same network as a caching server, every time you download an App, update or iBook the caching server will store a copy of that download. This way it can easily be grabbed from the server if another device needs that same download. This will result in very fast downloads and preservation of bandwidth as you don’t use your internet connection but your local network instead. I won’t go into the exact working of this service but if any of your Macs or iOS devices see a caching server on the network it will automatically contact it to see if the download is available. If it’s not it will check Apple’s servers instead. This all happens in seconds.
As far as I know the caching service supports the following:
App Store downloads: iOS and OS X
App Store App Updates: iOS and OS X
Software Updates: iOS only
iBooks: iOS and OS X
If you only have one Mac or iOS device, you may want to skip caching as it won’t be of much use to you. It can’t hurt to have it running, the only thing it may do over time is take up space so feel free to try it out and see if it’s for you. The service is easy to disable and the cached contents can be deleted with the click of a button.
To set up caching, flip the switch to On. And that’s it really, the service is up and running.
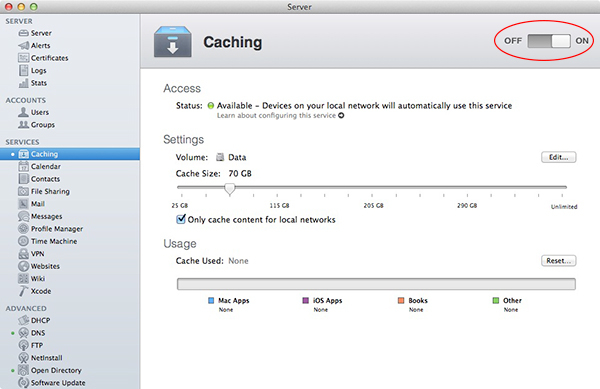
You can fine tune it by selecting the hard drive you want to use, this is where it will store cached contents. You can also specify how much space caching is allowed to use. You can adjust this at any time as well. Once the caching service is enabled and set up the way you like it, download some App Store updates from your iOS device and watch the “Cache Used” bar fill up like this:

Clicking “Reset” will flush the cache and start fresh.
Next, we’ll set up the Calendar service.
<- Page 5, Open Directory || Page 7, Calendar & Contacts ->
(Page 6)