Managing Clients
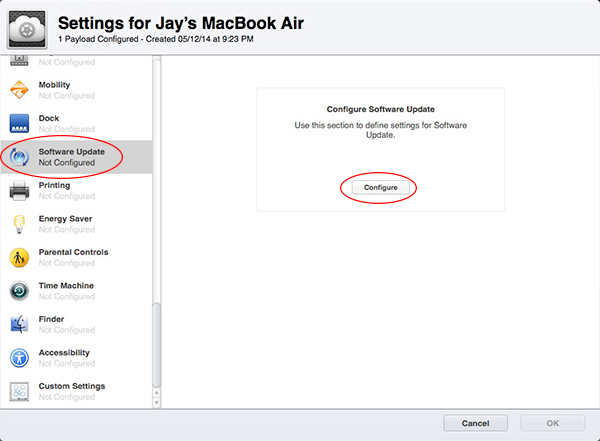
Looking at the settings for one of your client Macs scroll down until you find the Software Update service, click on it and then click the “Configure” button.
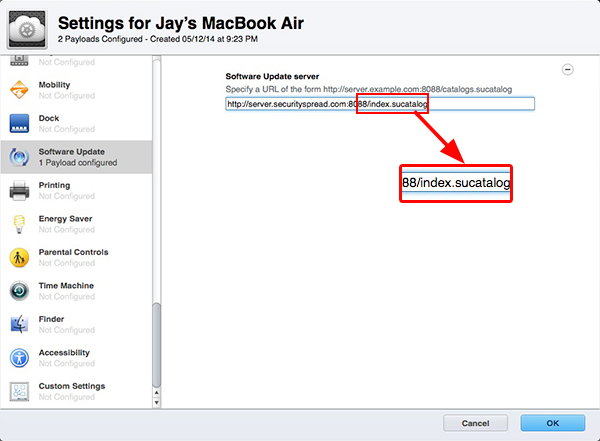
Next, enter the URL to your software update server. Keep in mind the example provided by Apple is not correct. Instead of /catalogs.sucatalog make sure you end your URL with /index.sucatalog.
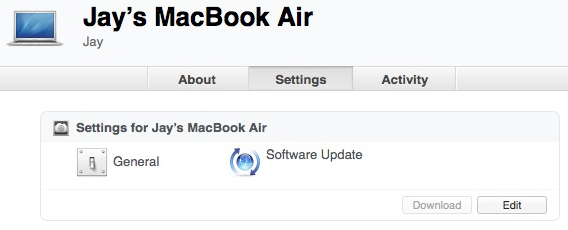
Click OK when done and you’ll notice the Software Update service was added to the settings for the computer you are managing.
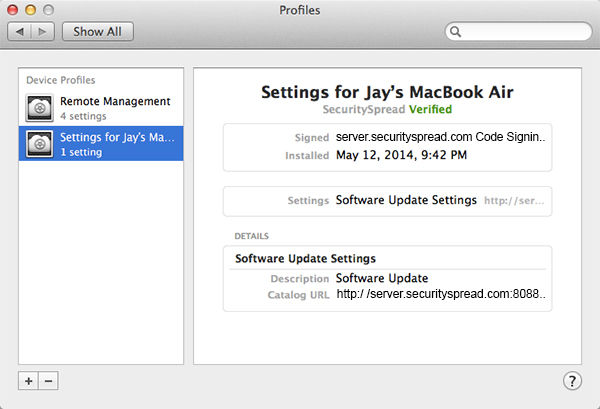
Click “Save” and the changes will be pushed out to your client machine immediately. If the Mac you are managing is offline the push will be pending until it sees the client online. On the Mac you just changed the settings for, go to System preferences > Profiles and you’ll see an additional profile containing the software update settings.
Now that you know the process you can create Device Groups and push out settings to multiple Macs or iOS devices at once. I wanted you to be familiar with the way this worked before making changes to multiple devices. I still prefer to manage each device individually as no two devices are set up the exact same way. Personally I change settings for the users rather than devices. My user is used on several Macs and iOS devices so pushing out user settings will apply to all devices automatically. Per device, per user, device groups or user groups, you have options. Find the best one for you. On the next page we’ll push out all the settings needed to make devices work with our services. The examples will use user settings but you can apply them to devices, device groups etc. however you want.
<- Page 12, Profile Manager || Page 14, Setup: Calendar and Contacts ->
(Page 13)