Profile Manager
It’s time to start connecting your client Macs and iOS devices to your server. The best way to do this is through Profile Manager. Setting this up is a bit of work and involves a few steps:
1. Setting up Profile Manager
2. Enrolling Macs and iOS devices
3. Pushing out settings to clients
Profile Manager allows you to make network wide changes and push them out to all connected clients right away. You can change settings per user/device, per group or for all users. It really makes managing multiple devices easy and fun. If you prefer to take the old school route and are not sure if this is for you, read the next few pages first before following along. I will cover what’s needed to get the clients up and running with our configured services but there is much more to discover in Profile Manager than that. I suggest reading up on it some more to discover what other benefits you can get from this service.
NOTE: Profile Manager has the power to make modifications on all of it’s connected clients machines and devices, including Lock and Erase. Make sure you have backups on all of your client machines and devices and your server is properly secured to keep unwanted people from potentially abusing this service!
Start by enabling the service with the by now famous “On” switch. Give the Server app some time to enable this service.
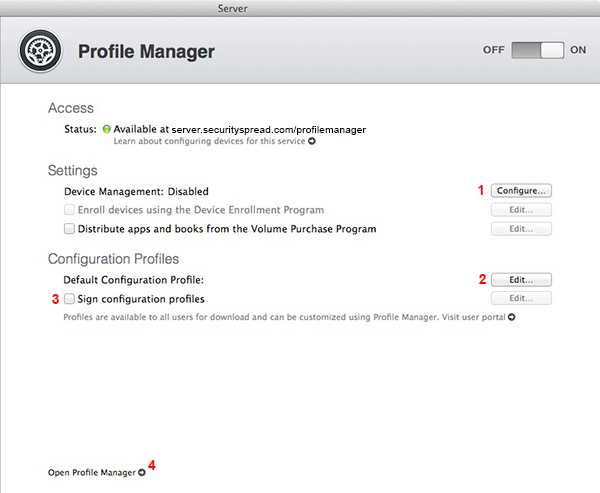
Once it’s running click the “Configure” button (1). A small configuration assistant will pop up, follow it’s instructions and make sure you select your new certificate that is signed by your own CA. Next, click the “Edit” button by Default Configuration Profile (2). This default profile will contain settings that apply for every user of the server and you can choose to also include settings for Contacts, Calendars and Mail. I chose not to include those configurations and left it at default settings.
Up next is the option to sign your configuration profiles, check that box (3) and make sure the right certificate is selected (the one you created, signed by your CA). This concludes the Server app end of Profile Manager, go ahead and click the “Open Profile Manager link down at the bottom (4).
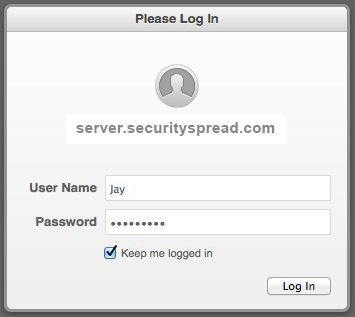
You’ll be presented with a login window, fill out the name and password with the details of the user account you just created but do not log in yet.
To test if your certificates are doing their jobs try to access the profile manager from another Mac on your network using your.domain.com/profilemanager (using your own domain of course). If your server is local only, use server.local/profilemanager or whatever name your server has. If you distributed the certificate to your other Macs and iOS devices as explained here, you should not be presented with any warnings* stating the certificate is untrusted. You know you are connected to your server.
*You may have to add the CA certificate to firefox manually. Safari uses the system keychain though.
Go back to your server and log in. You’ll be presented with the default window showing the ‘Everyone’ group. Explore the window, menus and options so you can get a feel for what this service can do.

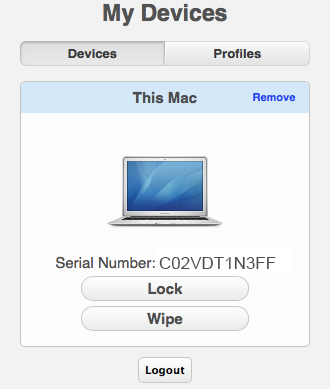
Now go to one of your client Macs, open a browser and go to your.domain.com/mydevices. Log in and you’ll be presented with the following window:
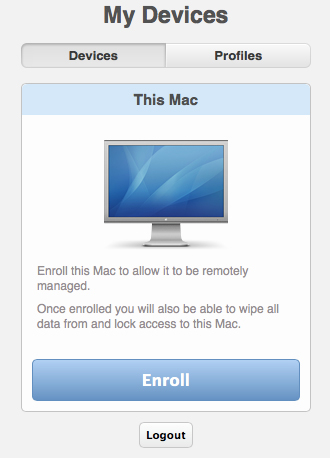
Usually you’d need to download a trust profile first before a Mac can be enrolled. Since you already distributed your profile CA to all your clients you can focus on enrolling instead. Click the “Enroll” button and follow the prompts.

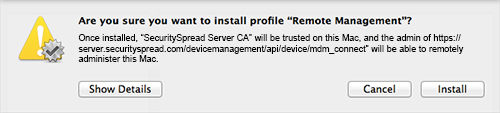
You’ll see a final window that shows you exactly what the just installed profile does. Scroll down to see all the info.
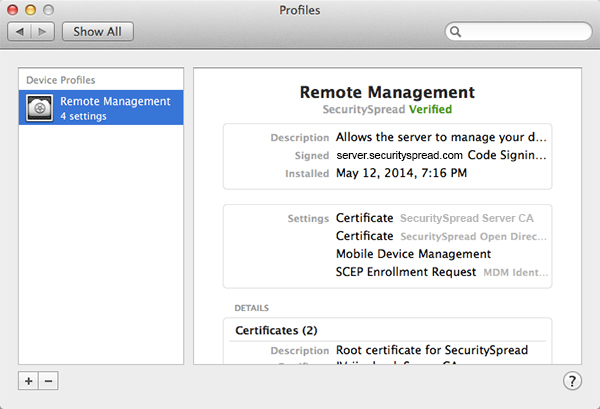
Now that you have a profile installed you’ll have an extra button in System preferences that allows you to see the profiles any time or even delete them.

Close system preferences and you’ll see your browser has already refreshed and shows your Mac has been successfully enrolled.
Go ahead and close the browser, you don’t need it anymore. Go to all your Macs and follow the same steps. On Macs that are not yours, use the other accounts you created to log in and enroll. Do the same for iPhones, iPads and iPod Touches.
With all your clients enrolled it’s time to push out some changes. From any of your Macs go to the profile manager site (your.domain.com/profilemanager), log in and go to ‘Users’. Select your own user in the list. When you click on the ‘Devices’ tab you should see all the devices that were enrolled under your account. Click the ‘Settings’ tab and click the ‘Edit’ button. You’ll see a big list of available settings that can be changed and pushed out to your devices. They are sorted by OS, starting with settings that can apply to both OS X and iOS, then iOS only and lastly OS X settings only.
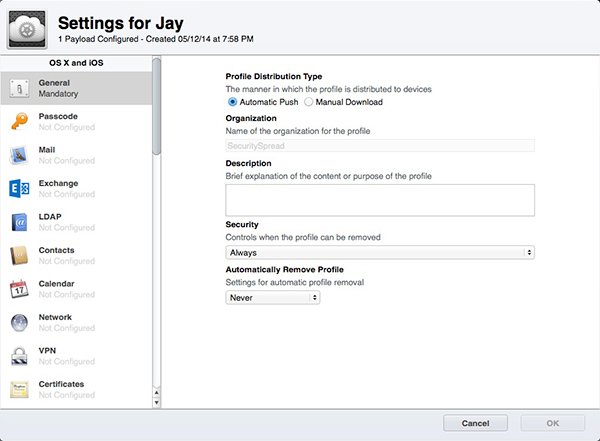
Make sure the Profile Distribution Type is set to “Automatic Push. Security can be set any way you like. If you are managing the devices of your children you may want to set this to “Never” on their accounts so they can not delete the management profiles and bypass all the restrictions you set. For your devices you can leave it set to “Always”.
These settings are limited however. If you want more precise control and more available settings, lose this window by clicking “Cancel” and go back to the “Devices” tab. Click on the gray arrow next to one of your Macs, click the “Settings” tab and then the “Edit” button. You’ll see more settings here like being able to set a Software Update or Time Machine path. Let’s configure some settings and push them out to the clients on the next page.
<- Page 11, Users || Page 13, Managing Clients ->
(Page 12)