Time Machine
Having your server handle all Time Machine related tasks has some benefits but it may not be for everyone. If you have multiple Macs and rely heavily on Wi-Fi, you may not want to use this service as it will really impact network performance every time one of your Macs does a backup. I use ethernet throughout my house for superior speed and performance so I set up the service. The biggest benefit is knowing that backups are being done. Before I had to check my family’s Macs to see when their last backup was, if the external drive was still connected, if the drive was full etc. Now all Macs are backing up to the server and the server lets me know if a Mac has not backed up in a while or if it’s running out of space. When I receive a push notification or email stating “Wife’s Mac has not backed up in 6 days” I know something is up and I can investigate. No notifications; I know everything is running smooth.
If you have an external hard drive connected to every Mac you can connect those to your server and use them for storage. You can also leave them connected to those Macs and schedule weekly clones or use them for additional storage. Ideally you connect a good sized hard drive to your server that can handle the backups of multiple Macs.
To get started, you guessed it, flip the switch to “On” and you’ll be presented with a Data window.
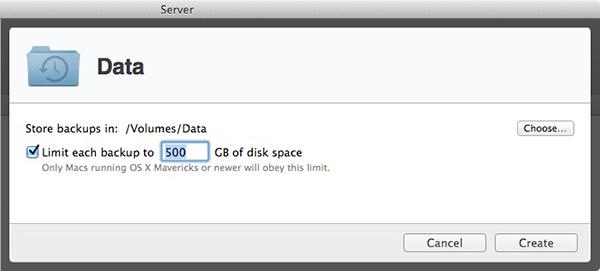
Choose a hard drive where you have enough space to store your backups. You may also want to set a size limit that will prevent one particular Mac from taking up all the available space and leaving other Macs with not enough. This limit can be set at a later date but I have found it is not enforced unless it’s set right away. Check each Mac and see how much space they are currently taking up on their hard drives. Don’t count the drive sizes though. For example, your Mac may have a 500GB hard drive but it may only have 85GB of data on that drive. Count the 85GB and move on to the next Mac. This will give you a pretty good idea of what each Mac needs and you can set the backup limit to an average or to what the fullest Mac needs.
Once that’s set up you are done with Time Machine. We’ll have a look at configuring the client computers and push notifications later on. You may notice the File Sharing service was enabled automatically. This was done to provide the network with your Time Machine drive so it can be selected as an option on the client machines.
<- Page 9, Software Update || Page 11, Users ->
(Page 10)