You got a Mac, now what?
Whether you switched from a PC or just got a Mac new from the store, congratulations!
Using a Mac is pretty simple but the “It just works” mantra generally applies to Macs that are on display in the Apple Store. They are wiped and restored to a known good clean state every night, your Mac will not enjoy a daily fresh start. All kinds of clutter, updates, upgrades, software installations, file deletions and possibly some malware along the way can leave your Mac in a less than desirable state. Use your Mac right and you’ll rarely have to worry and you can use your Mac for years until it’s time for a new one.
Assuming you just got your Mac, you set up an account and are now staring at a wallpaper of mountains. What’s next? Let’s cover the basics.
Bluetooth
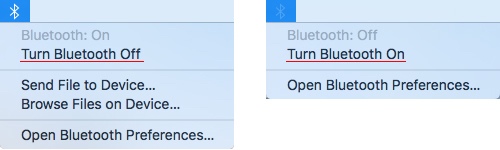
If you use a desktop (iMac, Mac mini or Mac Pro), chances are big you are using a wireless mouse and/or keyboard. For those to work, Bluetooth is required. If you have a wired mouse, keyboard or a portable (MacBook, MacBook Pro etc.) though there is probably no need for Bluetooth. At least not all the time. If you have a laptop, use the built-in trackpad, if an external mouse is required then turn Bluetooth on and disable it when you’re done using it. Bluetooth is a radio that’s constantly broadcasting and it may be a way for someone to probe or connect to your Mac. If you don’t need it, just turn it off. To do this go to the Apple menu > System Preferences > Bluetooth, there you can turn it off. You can also use the Bluetooth icon in the menu bar that should be there by default.

If you don’t have a need for Bluetooth at all, uncheck the “Show Bluetooth in menu bar” box. There’s no need to have it in the menu bar taking up space if you never use it. If you use a Bluetooth mouse or trackpad occasionally then leave it in the menu bar as it’s a fast and easy shortcut to turn it on and off.
WiFi
The above goes for WiFi as well. If you don’t need it, just turn it off. Desktop Macs can easily connect to ethernet but laptops may need an adapter to get this done. Ethernet traffic is faster, less prone to interference and unless someone has direct access to your router, can not be snooped on by someone. Things that are not true for WiFi. Someone can snoop on your WiFi traffic from a distance, attempt to break in to your network or try to connect and hack your Mac directly. As long as WiFi is on, your Mac is broadcasting some quite powerful antennas constantly looking for available networks. This poses a security risk but also costs you battery life if you’re using a laptop. If ethernet is available and you are using a desktop Mac, disable WiFi by going to the Apple menu > System Preferences > Network. There, select Wi-Fi and turn it off. While you’re there you can choose to hide WiFi from the menu bar as well.
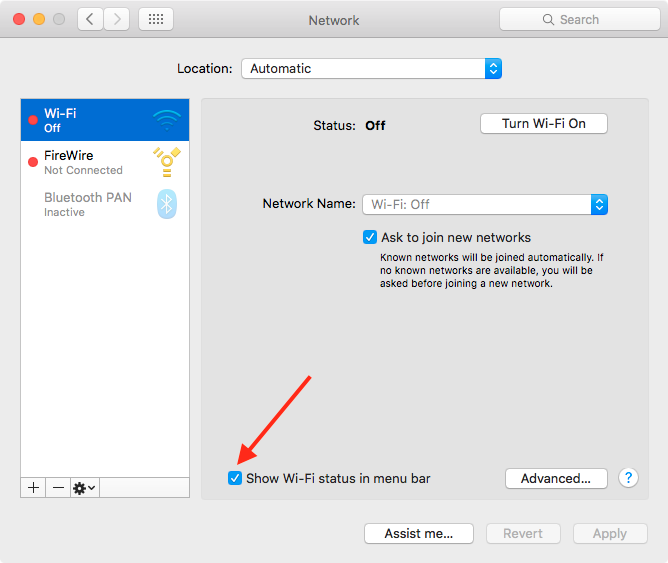
As with Bluetooth, if you use a laptop it is a good idea to leave the WiFi icon in your menu bar as you’ll probably need it when out and about. It’s an easy way to turn WiFi on and off, switch networks or confirm you’re connected to the right network.
WiFi – Preferred Networks
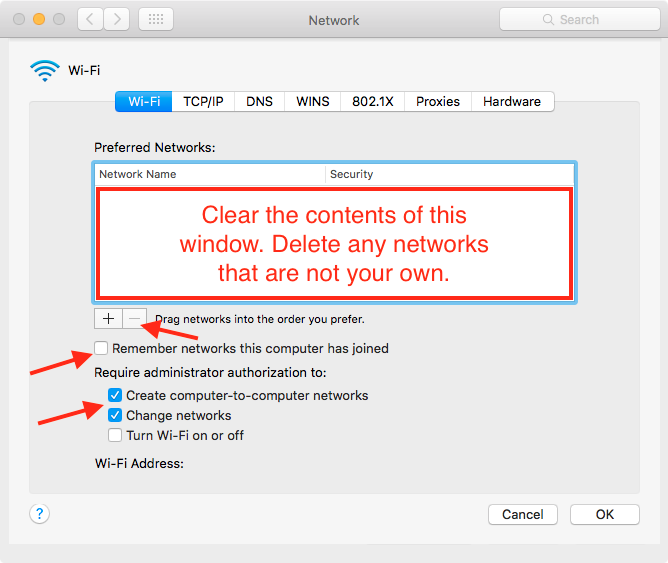
Your Mac will remember any network you have joined in the past. The Apple Store, xfinitywifi, Starbucks, Dunkin Donuts, McDonalds etc. are some that can be found on a majority of Macs. This is very convenient but also poses a security risk. Someone with malicious intent can set up a WiFi hotspot and name it “Apple Store”, your Mac will connect to it no questions asked and traffic sent over that connection can be monitored, intercepted or tampered with. To avoid this from happening, go back to System Preferences > Networks and click on Wi-Fi again. Now click the “Advanced…” button down at the bottom of that window and some more options will appear. I recommend selecting every network that is not your own home network and remove it using the ‘-‘ button. Do this every time your Mac has left your network and joined other networks. You can also uncheck the “remember networks this computer has joined” box to keep that list blank. You will have to enter the password to a network every time you re/join it though. The administrator options at the bottom are optional but are recommended if the Mac is shared with other users.
Firewall
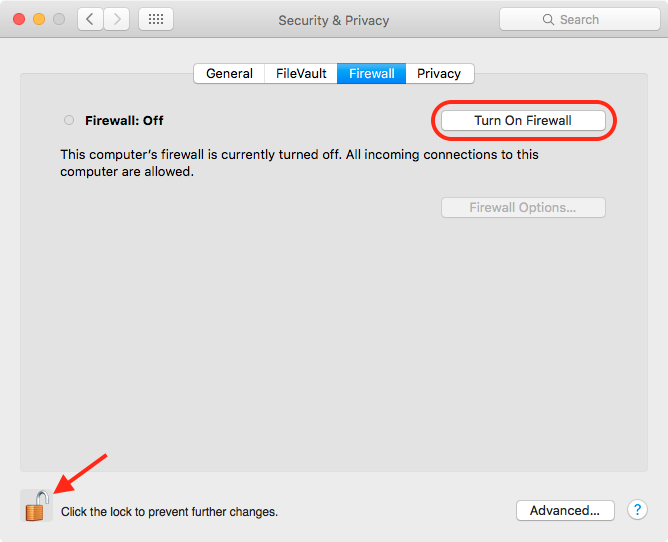
Your Mac’s operating system has a built-in firewall. Unfortunately it is disabled by default. Enabling it very straightforward though and once it’s on, you never have to look at it again. Go to System Preferences > Security & Privacy and click on the Firewall tab. Once there it’s as easy as clicking the “Turn On Firewall” button. You may have to click the lock on the bottom left of the window before the button becomes accessible. Don’t let the simple look fool you, the built-in firewall is quite powerful.
Once the firewall is on, the “Firewall Options…” button becomes available. Go ahead and click that.
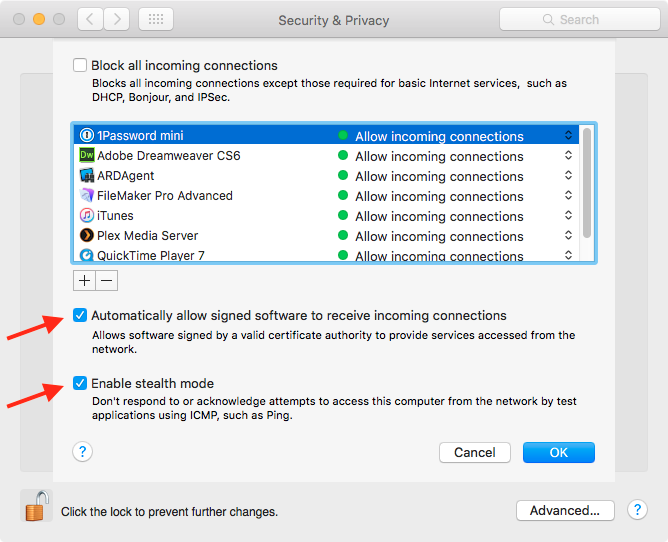
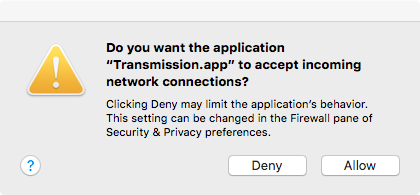
Over time the list of applications listed will grow and unsigned applications that want to receive incoming traffic will ask for your permission first.
If you want more control over which applications are allowed incoming network traffic, uncheck the “Automatically allow signed software to receive incoming connections” box which is checked by default. This will prompt more applications to ask permission before allowing incoming network traffic.
Stealth mode can be enabled but can cause some applications not to function properly. If you run a media server for example, stealth mode can cause clients to not be able to connect.
Security & Privacy – General
Since we’re already in the Security & Privacy pane, we may as well check out the General tab. Here there are a few settings you should have enabled.
First, require a password immediately or shortly after sleep or screensaver begins. This allows you to walk away from your computer quickly if needed without having to worry someone may be messing with your Mac. This setting has a counterpart that I will cover later on. Of course automatic login should be disabled so that only you have access to your data when the Mac first boots up. Which apps to open is up to you but it is recommended never to use the “Anywhere” option. “Mac App Store” is the safest option and should be used if you are really new to Mac. If you are somewhat more familiar with Mac and need apps from other sources (Adobe is a good example) then select “Mac App Store and identified developers”.
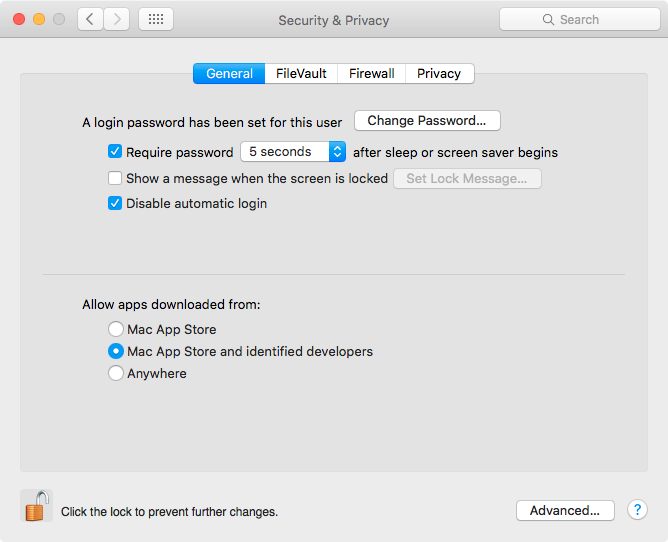
Unfortunately there is malware out there that actually uses valid developer certificates with the sole purpose of bypassing these security settings so make sure you get your software directly from the source and the source is reputable. There have been cases where the App Store hosted a malicious app but this is far more rare. This alone makes “Mac App Store” a much safer option.
Security & Privacy – FileVault
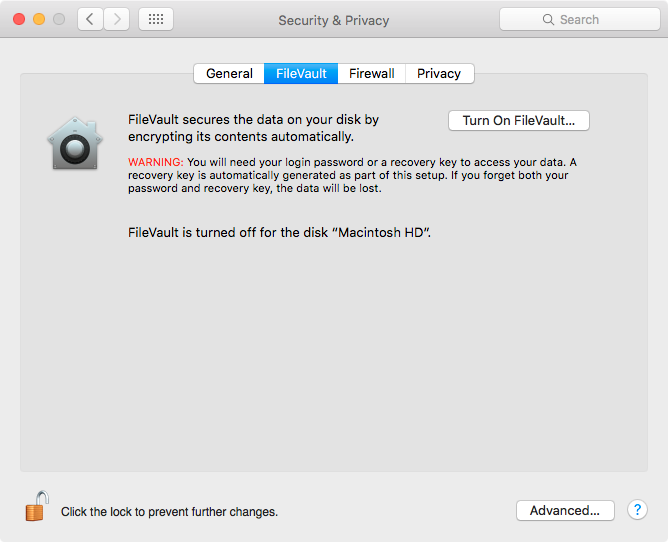
If you are new to Mac, chances are you have a Mac that uses a Solid State Drive (SSD) or a Fusion Drive (hybrid SSD + HDD), these things are very fast and can easily handle full disk encryption with FileVault. If your Mac has a regular Hard Drive (HDD) then make sure the Mac is a 2013 or newer model and you should be able to use full disk encryption without noticing a performance hit. FileVault encrypts your entire drive and ensures no-one but you can access the data. Even if the Mac is stolen and the drive is extracted, the data is safe. Enabling FileVault is recommended and is as easy as clicking the “Turn On FileVault…” button. In case you wandered off exploring your Mac, we are in System Preferences > Security & Privacy > FileVault.
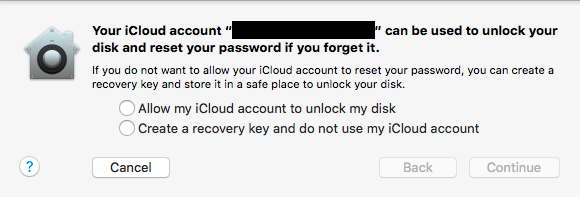
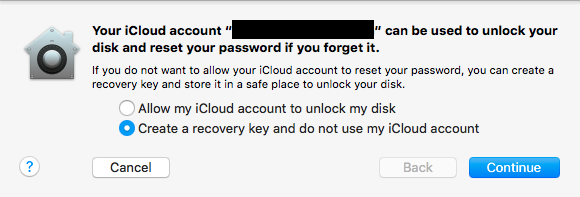
Once the button is clicked, a smaller window will pop up that will guide you through enabling the full disk encryption. The first step is a choice, do you want your iCloud account to be able to unlock your drive or do you want to set a recovery key instead? You won’t need either unless you forget your login account password. Using the first option puts the power in Apple’s hands through iCloud. What if iCloud gets hacked? What if there’s a bug? I don’t know, but I feel more comfortable having full control of the recovery key myself.
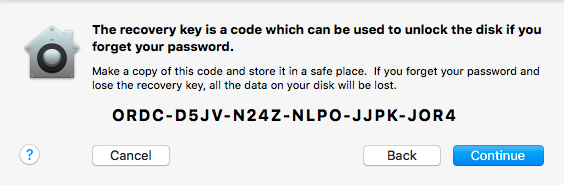
For option two, you will be presented with the recovery key once you click “Continue”.
Print it, write it down, save it in your password manager if you use one (you will but we’ll get to that later). If you lose this key and you forget your login account password, you will not get to your files again. The only option left is to wipe the Mac clean, re-install and start fresh or hopefully restore a backup.
With the recovery key safe, click continue. Now restart your Mac and the encryption process will begin.
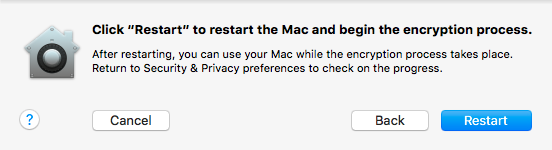
Encrypting your drive may take some time depending on how much data is on your drive. As you are probably new to Mac, your drive should be almost empty so this won’t take long. Either way you can use your Mac while the encryption process is in progress. If you want to see exactly how it’s doing, go back to the FileVault pane to see a progress bar.
Security & Privacy – Privacy
The privacy settings will show you which applications have access to which resources. Configuring these settings depend on which applications you have installed so no recommendation can be given here really. There is no right or wrong way to set this up but you can disable location services completely if you don’t want any applications to use that information.
I think we squeezed enough information on one page. You got the hang of this now and are on your way to a more secure system. On the next page we’ll cover some more System Preferences related tweaks you can make to secure your system.