Problems installing updates
Here is some troubleshooting you can do if a Software Update won’t install.
Verify you have enough free hard drive space.
This can be done in a few ways. Verify the free space by using two of the following methods, or all three. If a corruption is present one of these methods may not show the correct amount of free space.
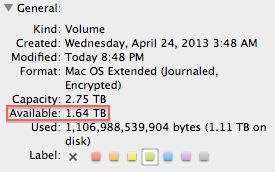
1. Right click your hard drive icon in the Finder and select Get Info from the menu. In the window that opens up look for the amount of space that is still available. On your startup drive you want this to be 15-20Gb ideally.
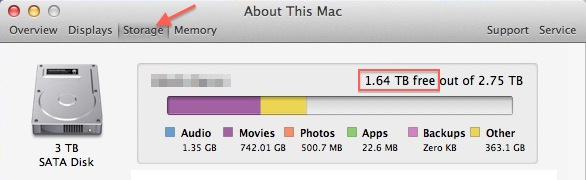
2. Click on the Apple logo in the very top left of your screen and select “About this Mac”. Once the About window opens, click the “More Info…” button. In this window, click the ‘Storage’ tab and read out how much available space you have.
3. Double-click on your hard drive to show it’s contents, then from the ‘View menu’ select ‘Show Status Bar’. You’ll notice the hard drive window you just opened has an added grey bar at the very bottom of it. In the center of this bar it will show you how much space is still available.
![]()
If you do not have enough space available, don’t start throwing out files right away but see if your trash is currently empty. It’s possible there are many GB’s of data in your trash that are still taking up space until the trash is emptied. If the trash is empty or not enough free space is available after emptying it, delete files you don’t need or temporarily transfer them to an external drive.
Disable antivirus and other system monitoring utilities.
An antivirus application’s real-time or on-access scanner can get in the way of software updates. Disable all tools and utilities that monitor or manage your system and network and then try the download and installation again.
Back up your data or update your existing backup before continuing.
There can be any number of issues that cause the update not to install but one thing is sure, something is not right. So backup your data just to make sure you have a safe copy in case something goes wrong. Use OS X’s built-in Time Machine at least and if you have an extra drive available make a clone as well.
Verify your drive.
For Lion, Mountain Lion & Mavericks users – Restart your Mac and hold down the Option key immediately when you hear the startup chime. Select your Recovery Drive as the startup drive. Once you are booted up, select Disk Utility, select your ‘Macintosh HD’ in the left column and click ‘Verify Disk’ on the right. If issues are found, click the ‘Repair Disk’ button. While you are in this window you can also click ‘Repair Permissions’. Restart your Mac and see if you can install updates now.
For Tiger, Leopard & Snow Leopard users – You won’t have a Recovery Drive available so you have to use the OS X install DVD. Insert the DVD and restart, then hold down the Option key immediately when you hear the startup chime. Select the install DVD as your boot drive and once started, select a language and go to the top menu where it says ‘Utilities’. Open Disk Utility and then follow the same steps as described above.
Repair Permissions.
This can be done as described previously in Verify your drive but it can also be done without having to restart. Find Disk Utility in your Applications > Utilities folder, select ‘Macintosh HD’, then click ‘Repair Permissions’. Restart when done and see if the updates will install now. This is good basic maintenance to do even if your Mac is performing well.
Download the update and install manually.
If all of the above fails it is likely that something is wrong with your system. This can be a corrupt preference file or a more serious issue in OS X or maybe even hardware. It is rare for the update itself or the Software Update application to have an issue but just in case, download the update directly from the Apple website and install it manually. Go to this site and search for the update you are after.
If the manual installation of the update fails too, at this time it would be best to re-install your system. You can try to install OS X over the current version (leaving your data intact) and see if that resolves the issue. To do this, start up from your Recovery Drive and select ‘Install OS X’. The installer will see that a system is already present and attempt an Archive & Install, basically re-installing the system components only. For users that do not have a Recovery Drive, use the OS X install DVD. Earlier versions of OS X will show this option as ‘Archive & Install’ whereas newer versions are clever enough to figure this out for themselves. To start from scratch, reformat your hard drive first using Disk Utility and then start the OS X install.
1 thought on “Problems installing updates”