Setting up your own sync server [Updated]
NOTE: I have moved this post in it’s entirety to a separate page set which can be found in the top menu or here. Comments have been moved to the last page of that set as well. Splitting the post up into multiple pages is easier to read for you and easier to update for me 🙂 This post will stay in place as there are many other websites that link to it and I do not want to destroy those links. For updated content and comments please check out the new pages.
With iTunes in Mavericks no longer able to sync your contacts and calendars, people have set out to look for alternatives. For me this meant setting up my own server. To set up a server that’s accessible through the internet you need a domain, setup DNS and have a good understanding of firewalls and security so you won’t put the server and all it’s contents at risk. Setting up a local server is much easier and as it does not accept connections that come in from outside of the network it’s much safer too. This entire post is for OS X 10.9 Mavericks.
Preparations
Securing your network – Make sure you have a strong Wi-Fi password set. If you haven’t changed it in a while, do so now to make sure there are no unauthorized connections. Also make sure you have a good firewall and your modem/router firmware is up to date. Remove any open ports / port forwarding rules you don’t need.
Pick a computer that will act as your server – Mac mini’s are great for this. Ideally a Mid 2010 or later model as they only consume 85W at full load. These models also support Mavericks so it will allow you to run the latest OS X and Server software. Usually I would not recommend using your primary work machine as a server but if it’s the only Mac you have then I see no problems installing Server on it. Ideally the server Mac is on 24/7 (this is why an energy friendly Mac mini is ideal) and depending on your plans for the server it can use up quite a bit of resources (this is why a dedicated Mac would be best).
Secure your server – Update the OS to the latest version, get rid of Flash and Java and pick a strong login password. Set a screensaver password and use some form of encryption to secure the files. This should make sure anyone with physical access to the server will not be able to get to your files. Optionally use an external drive to store all of the server files on (encryption recommended) and connect a battery backup/surge protector (always a good idea).
BACKUP YOUR FILES – If this is an experiment for you, please backup your files. If you are using your primary Mac for this, make a clone of your system and update your Time Machine backup. If this is a secondary Mac that has nothing important on it then move on to backing up your Macs/iDevices that will sync with the server. Here’s how to backup your iDevice. On Macs that will be syncing with the server once it’s set up, make backups of your address book and calendars. Open Contacts and Calendar applications, go to the File menu > Export > Contacts/Calendars Archive. Optionally you can export your Vcards and individual calendars (exporting individual calendars will come in handy later).
Installation and setup
Open up the App Store on the server Mac and search for the Server App. It’s a $20 purchase. Installation is just clicking the “Continue” button and waiting for it to finish.
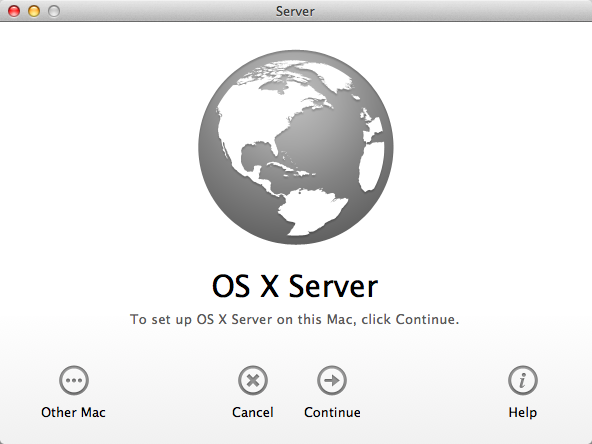
Once it’s done Server will open and present you with a Tutorials window. If you’re new to this, check them out! There’s really useful stuff in there. To get to the tutorials later on you can find it in the server help menu. Closing the tutorials window reveals the server application. It’s clean, simple and shows you just the essentials. The screenshots will show I used a MacBook Air, this was just done for the purposes of taking the screenshots. I run Server on a Mac mini that’s much better suited for the job.
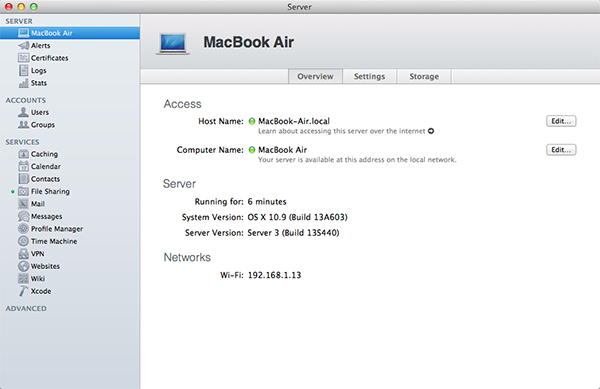
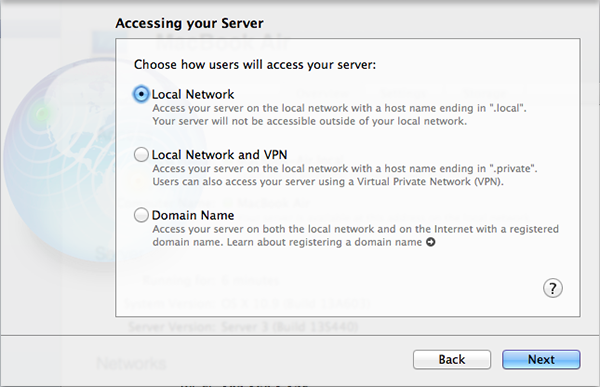
This is what you should be looking at now. You’ll notice the server Host and Computer name were configured for you. Click the ‘Edit’ button to change the Host name and a new window will pop up. Click next and you’ll be asked to select one of three options. Select ‘Local Network’. I’m running you through this setup (even if you like the default Host name) so you can see/make sure it’s set up as a local server only and you’ll know where to go if you ever want to take the server online.
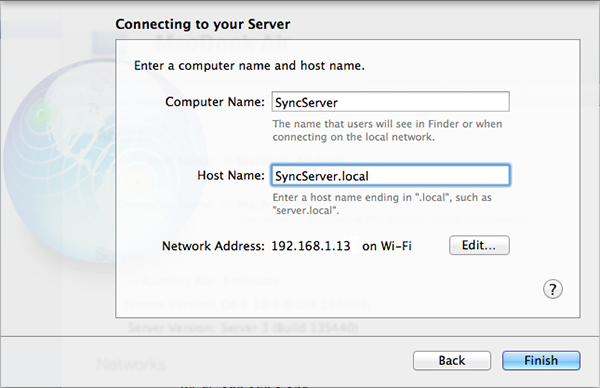
Enter a Computer name of your choosing and the Host name will be automatically changed for you. You can leave the Network Address set to it’s default. If you have an option to switch to ethernet cable at this point I would (faster and no interference) but you can also leave it set to Wi-Fi. Just syncing contacts and calendars requires very little bandwidth but if you plan to use the server for file sharing or Time Machine backup destination I suggest using ethernet. Click Finish once you’re happy with the new name and settings.
The main window should now reflect the changes you made by Host name and Computer name. Now click the ‘Settings’ button.
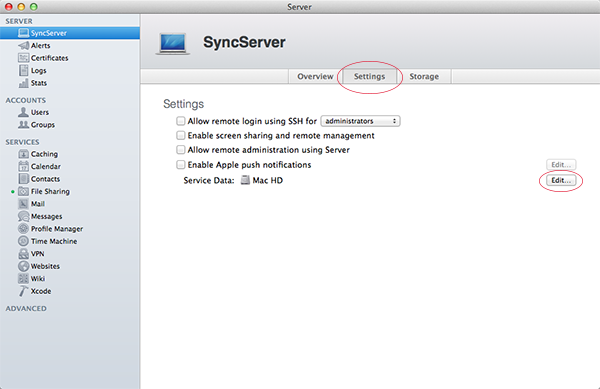
Ignore all the checkboxes, it’s the Service Data location I want to focus on. The Service Data is everything related to your services. Contacts and Calendars in this case. These don’t take up much space (few MB) so the default location (your startup drive) is fine. However if the mac breaks it’s nice to have this data on another drive. This is where the external drive comes in. If the server ever goes down, you can configure another Mac and have all the data ready on the external. If you prefer to leave it at the default setting then that’s fine, just backup regularly just in case.
The server has set up security certificates for you. The default encryption is 2048bits so these self-signed certificates are good enough for me to use. If you ever take your server online you may want to get a stronger certificate though. Refer to the tutorials to see what this is for and how to set it up.
Almost there, it’s time to enable the services you want to use. Click on Contacts in the services list on the left and click the on/off button. No further configuration needed. Do the same with Calendars and Mail (needed to sync Notes). Simply enabling them is all it takes except for Mail. In the Mail tab click on the “Edit Filtering Settings” button and disable all options.
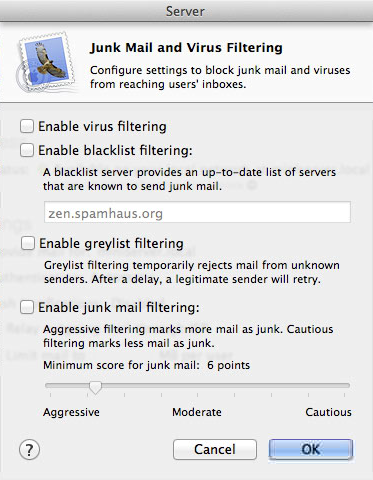
Leaving the default options enabled can’t hurt but it will take considerably longer to set up the service. As you won’t need the actual Mail part of the service, just the framweork for Notes to sync, you won’t need antivirus etc.
Now we just have to create a user account that can be used to connect to these services. For this, click on Users. You’ll see your own user account already in the list but for security purposes I prefer to create a new account and limit it to just those services. This way your main administrator account can’t be compromised if one of your Macs or iDevices is ever lost or stolen. Click the ‘+’ to add a new user, give it any name you want and a good password. Make sure you set the ‘Home Folder’ option to ‘None – Services Only’.
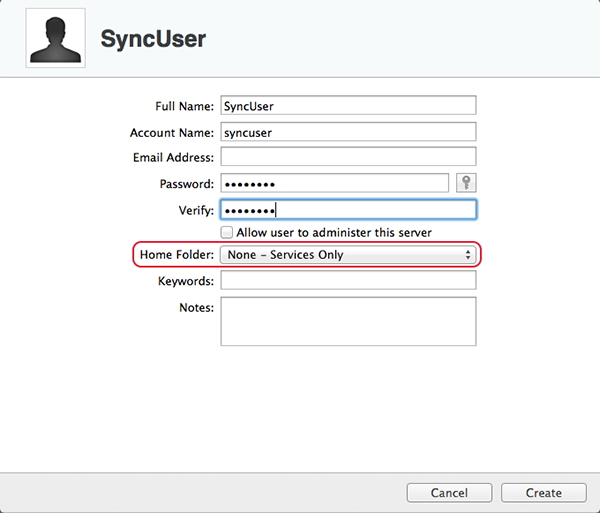
When done, click Create.
A few minor tweaks need to be made to this new user account before it’s ready to be used. Highlight the new account in the list and click the gear button at the bottom. From the menu that pops up select ‘Edit Access to Services’.

A small list will open where unused services can be disabled. If the options are all grayed out there should be a button at the bottom left of that window where they can be enabled. Turn off all the services that user will not be using.
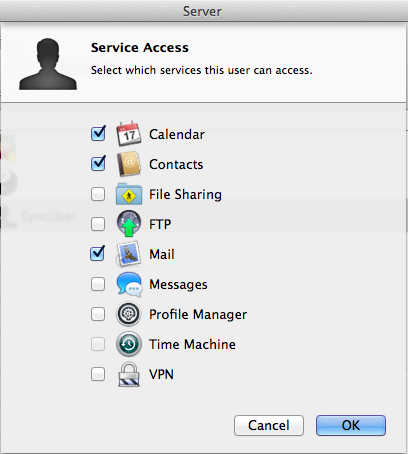
Click ‘OK’ and you’re done configuring the server.
Still with me? Nice! Let’s configure your Mac to start using the new server.
Configuring OS X to connect and sync with the server
Of course the end goal is to have your iDevice sync with the server but the server won’t have any content to sync if your Mac is not set up to sync your current contacts and calendars to the server, capisce? Alright, assuming you have a backup and/or export of all your precious data, let’s get started.
On the Mac you want to sync go to System Preferences > Internet Accounts. In the list on the right, scroll down and click “Add Other Account”. From the options that come up select “Add an OS X Server Account”.

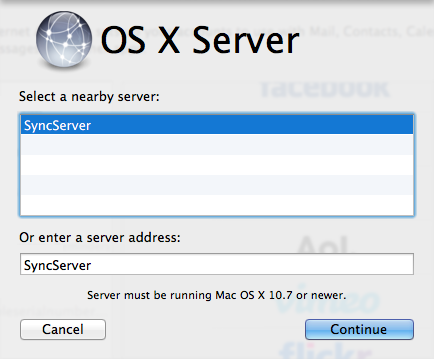
In the window that opens your new server should show in the list. Just click on it to select and hit Continue.
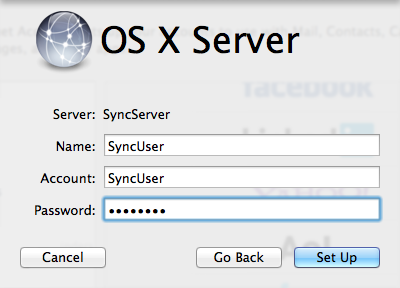
It will then ask you for the account details. Use the account you created earlier and click Set Up.
Finally it will confirm which services you want to use (do NOT enable Contacts at this point, also leave Mail off), confirm and hit Done.
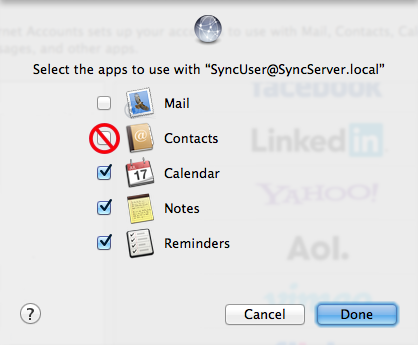
Due to a bug, setting up Contacts has to be done separately. Enabling it in the previous step will result in you not being able to copy over or edit your contacts. To sync Contacts we have to add a separate CardDAV account so click “Add Other Account” again and this time select “Add a CardDAV account”. Click the Create button and set up your account.

If you run into any authentication issues try your user name without capital letters.
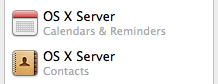
The end result can be a single entry in the list of accounts or it will split into two entries, one for contacts and one for calendars and reminders. No idea why it does this but it doesn’t matter.

Now open your Contacts and you should see something like this:
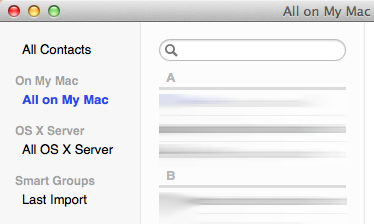
You may also see iCloud contacts or Google contacts in the list depending on what other accounts you have set up. Now to sync all your contacts with the server, select ‘All on My Mac’ (this is where all the originals should be), select all of your contacts and drag them to ‘All OS X Server’. (It may show “All OS X Server” or “ServerName.local”) If you have no contacts on your Mac then grab them from iCloud, Gmail or Exchange, wherever they reside. Leave other accounts in place for now until you have tested the functionality of your server. Do the same for Calendars, migrate them to the server. The easiest way is to use the File menu > import. (then import the backups of individual calendars you made earlier one by one) Note, re-create your calendars on the server before you import the old ones. If you had multiple calendars before (home, work, misc) then create these on the server first. Once you import the backed up calendars you will be asked to select a destination calendar (thanks troxel).
Look out for any warning symbols like this one: ![]() If you see this, click on it and you’ll be warned that the identity of the server can’t be verified. Click on “Show Certificate” and check the “Always trust” checkbox so this will not bother you again.
If you see this, click on it and you’ll be warned that the identity of the server can’t be verified. Click on “Show Certificate” and check the “Always trust” checkbox so this will not bother you again.
Notes are tricky. There is no effective way to back them up and/or transfer them to your server. Dragging them over may delete them from your Mac without actually syncing them to the server. Experiment with this at your own risk. I ended up copy/pasting all notes over (I only had a little over 30 of ’em) and backed them up using PhoneView from my iPhone.
Your contacts should now reside on the server, time to sync another Mac or iDevice to see if it worked.
Configuring iOS to connect and sync with the server
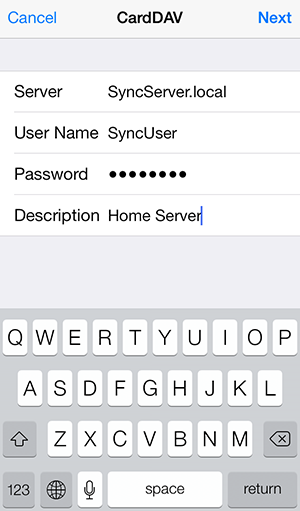
On your iDevice make sure you are connected to your home Wi-Fi first. Once confirmed, open Settings > Mail, Contacts, Calendars >Add Account. From the options, select ‘Other’. You’ll see that there is no convenient way to add everything in one go, you have to set up syncing for Contacts and Calendars separately. We’ll begin with Contacts, select “Add CardDAV Account” and fill out your server address and user info.
After you hit ‘Next’ it will start verifying your account details. During this you may be presented with a pop-up message or two. The first one will most likely be “Cannot Verify Server Identity”. This is because your server uses a self-signed certificate that has not been given the OK by a reputable Certification Authority (CA). This is fine and you can tap ‘Continue’. The second message may be “Cannot Connect Using SSL”. This was not an issue for me but I know it can happen. As this is a local server on your trusted (and secured, right?) network, I’d say continue and set it up without SSL. If you ever take your server online through definitely use SSL and perhaps a stronger/authorized certificate as well.
Once done, add a new account but this time select CalDAV, this will handle Calendars and Reminders. Follow the same steps as for Contacts.
When that’s done too, open your Contacts app and verify it synced with your server. If you already have accounts in place tap on “Groups” top left and de-select all of the ones that are not your server. When you return to the contacts list and all your contacts are still there, it worked. In that case you are looking at the sync from your very own server. Verify the same for Calendars.
Now to test if syncing is working open up Contacts on your Mac and on your iDevice. Add a contact on your iDevice and wait for it to appear on your Mac and vice versa. Quitting the apps on both sides and re-opening will speed things up a bit because it syncs every x-amount of minutes, it does not use Push like iCloud. Same goes for Calendars. To sync Notes I believe you have to set up a mailserver which I will not cover here.
Once you verified everything works the way it should, you can disable (not delete) your other sync services (iCloud Contacts, Calendars etc.) This will not delete the data off the server but leave it on their servers. For now this will act as a backup just in case you experiment your server into a kernel panic 😉 Keep in mind that syncing will only work inside your home, on your network. This is exactly the way I wanted it, my contacts and calendars will not leave my home so no government snooping can happen. On the road you can add contacts and calendars and once you’re home it will all be synced to your server and other Macs/Devices. This will work if it’s just you that needs the information but if you are sharing calendars with other people for example… this will not work. But you got here because you simply wanted to sync between your Mac and your iDevice right? So this setup should be good enough for now. I’ve been enjoying this for quite some time and have found no issues with it, I hope it can do the same for you.
Forcing users to use iCloud when the trust in major corporations/internet is at an all time low due to governments snooping and intercepting pretty much everything, seems like a stupid move. Perhaps they were well aware and knew it would drive Server sales? Who knows. Maybe they do want us to switch to PC, as on Windows the sync option is still there!
If you have suggestions, how to do some (or all) of this better or more secure don’t hesitate to leave a comment. If you’re encountering problems with the installation, setup or syncing I suggest contacting Apple support or visiting the Apple Support Forums where you’ll find people way more qualified than me in this department. Good luck!
Thank you for the comments and emails that resulted in the updating and improvement of this article!